No keyboard, No Mouse, No Screen needed! Raspberry Pi Zero W not giving you a green light, Watch this, it is not broken! Lets check it out and set up a raspberry pi zero w v1.1, and see why it does not light up when plugging it in!
The Raspberry Pi Zero W v1.1 :
- 802.11 b/g/n wireless LAN
- Bluetooth 4.1
- Bluetooth Low Energy (BLE)
- 1GHz, single-core CPU
- 512MB RAM
- Mini HDMI® port and micro USB On-The-Go (OTG) port
- Micro USB power
- HAT-compatible 40-pin header
- Composite video and reset headers
- CSI camera connector
When I started out with the Raspberry pi Zero W, I thought plugging it in to see a boot screen of some sort would be the first step. When I plugged it in with the USB cable, and ZERO happened, my first though was that there was an issue with the USB cable.
After getting a new cable and trying again, with the same result, I then thought maybe my Pi is DEAD!
I looked online and found that the power LED and power sequence does not start unless the PI has a boot OS.
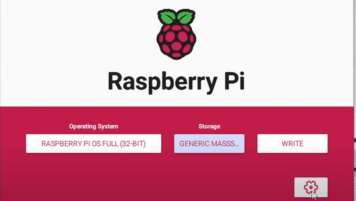
So we go to the Raspberry site and download the Raspberry Pi Imager from: https://www.raspberrypi.com/software/
Once this is on an SD card and set in the Pi, booting up is no Problem!
There are lots of great options to configure the Pi OS within the imager software so you can get it set up and connected to WiFi without having to plug the Pi into a screen or keyboard & Mouse.
Just use the Advanced settings by selecting the Gear Icon

You will want to enable SSH in the advanced setting, so you are able to connect to the Pi when it does boot up.
This make it super simple to setup and configure without any cables or special dongles to connect a monitor to see what is happening.
Plug your SD card into your Pi and wait a few minutes for the LED to stabilize and then attempt to connect with SSH.
That should do it to get started with your Raspberry Pi Zero W.


